
Configure L2TP/IPsec with Network Manager - Gnome Edition (Works for Unity too)
In this guide we will learn how to configure Network Manager’s L2TP/IPsec plugin with one of our server location.
For the purpose of this guide, I am going to use PrivateVPN’s L2TP/IPsec server in India.
Step 1 - Installing L2TP/IPsec plugin for Network Manager
Install L2TP/IPsec with Network Manager plugin from a terminal window:
sudo apt-get install network-manager-l2tp network-manager-l2tp-gnome
Step 2 - Setup a L2TP/IPsec Profile in Network Manager’s plugin
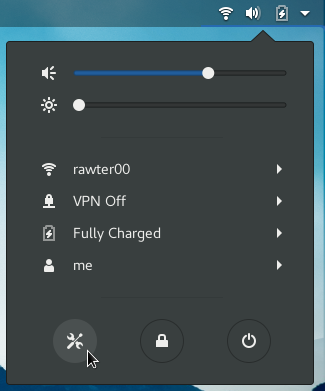
From the Gnome Menu - open All settings and click Network, as shown in the picture below.
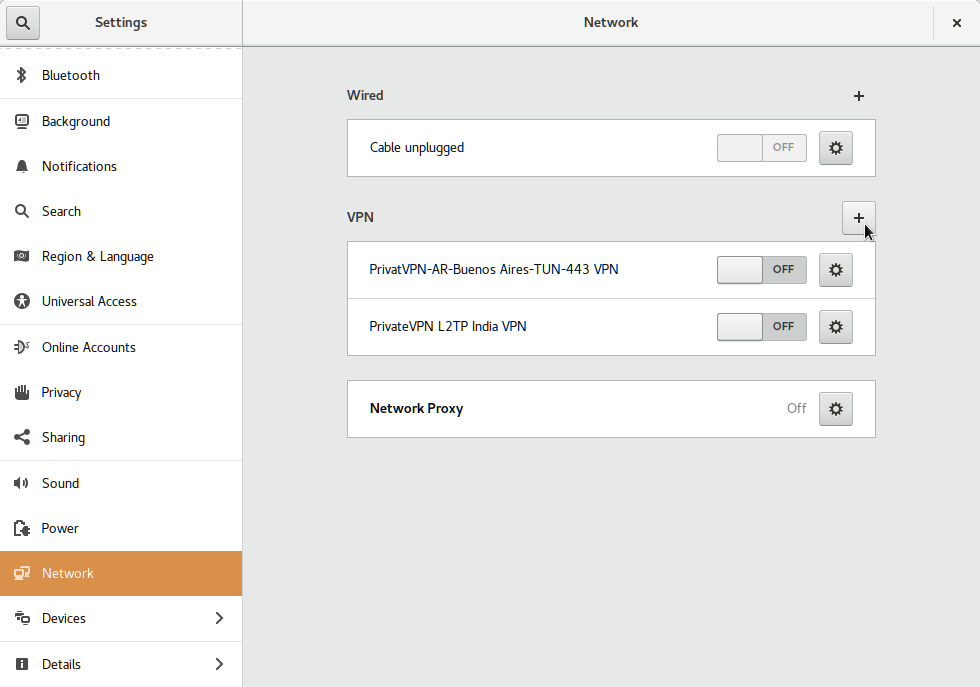
From the Network setting page, click + to add a L2TP/IPsec VPN profile as shown in the picture below.
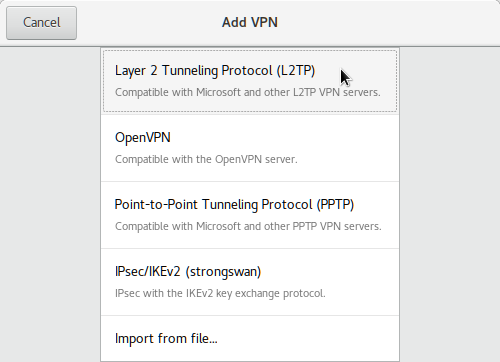
In the next dialog window, Under Identity tab, enter a profile Name, Gateway or server address from https://privatevpn.com/serverlist and also input your PrivateVPN credentials and click IPsec Setting…
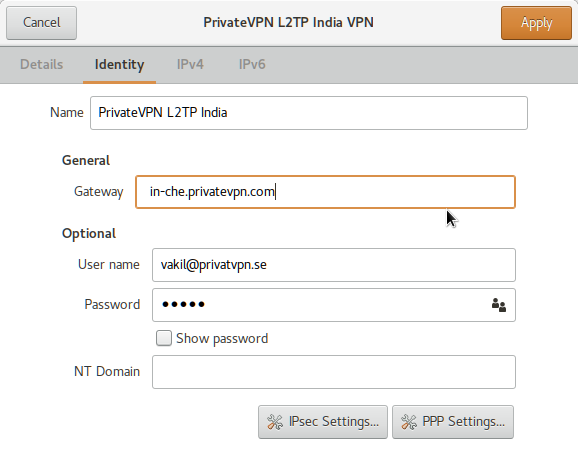
If you are from China or Middle East (UAE etc), server address in Gateway is useless, because PrivateVPN.com domain name is blocked in your country and hence it won’t resolve to an IP address resulting is no connection. So, it is advised to use Server IP address instead as show in following image and it should be fine then.
In L2TP IPsec Options, Tick Enable IPsec tunnel to L2TP host and input Pre-shared key as privatvpn and click OK to continue.
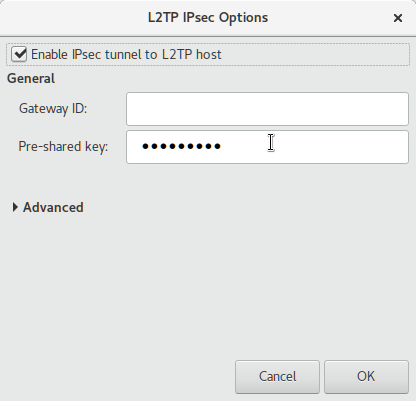
Click Apply to add L2TP Profile to Network Manager’s plugin.
Step 4 - Connect
Now lets get you connected to PrivateVPN’s L2TP server over IPsec. From the Gnome Menu Bar just turn ON the VPN server location you want to connect to and that is all.
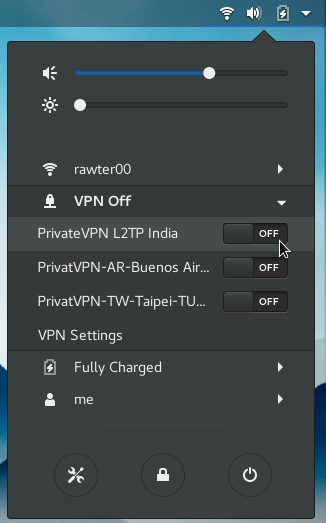
Note: You would only see Connect option under VPN if you have only one server location added.
Once connected you will see a lock sign as seen in the image below.

Enjoy your encrypted Internet!
